To freeze enchiladas correctly, you will first need to cook them according to your recipe in a freezer-safe dish. Once your enchiladas are ready, you will then need to flash freeze them, transfer them to a freezer-safe vacuum bag, and return them to your freezer until you’re ready to defrost them.
The rest of this article will also answer some other questions you may have, such as whether or not you can freeze enchilada filling.
1. Cook Your Enchiladas
Before you can freeze your enchiladas, you must first assemble and cook them. For best results, cook them in a freezer-safe dish that you have lined with parchment paper.
Ensure that the parchment paper hangs out of the dish a little. This will make following the other steps in this article a little easier.
Keep in mind that this method involves freezing cooked enchiladas. So, you should assemble your enchiladas with the sauce over them.
Pro Tip: Once your enchiladas are ready, pull them out of the oven. Do not separate them into individual portions – if you do so, it will make reheating them far more complicated.
2. Flash Freeze Your Enchiladas
Before flash-freezing your enchiladas, you must allow them to cool completely. You cannot flash freeze hot enchiladas as this will negatively affect both the shelf life and the taste when they are defrosted.
Flash freezing involves freezing an item for just a few hours. Alternatively, you can also use liquid nitrogen to flash freeze your items immediately.
However, while this method is popular among professional chefs, it’s unlikely you’ll have liquid nitrogen in your pantry. Luckily, you can use your refrigerator instead.
To flash freeze your enchiladas, you should simply wrap the dish with foil tightly. Once the dish is wrapped, transfer it to your freezer, and freeze until the enchiladas and sauce are firm to the touch.
3. Freeze Your Enchiladas
Once you have flash-frozen your enchiladas, it is now time to freeze them properly. To do so, you should:
- Remove the flash-frozen enchiladas from the freezer and remove the foil wrapping.
- Using the parchment paper, lift the enchiladas out of the dish.
- Transfer the enchiladas to a freezer-safe vacuum bag.
- Place the bag with the enchiladas in the freezer.
If you aren’t a fan of vacuum bags, you should:
- Remove the dish from the freezer.
- Unwrap the foil.
- Fit a lid over the dish.
- Transfer the lidded dish with the enchiladas back to the freezer.
If you plan to follow the second method, you will need to use a baking pan with a lid when making your enchiladas.
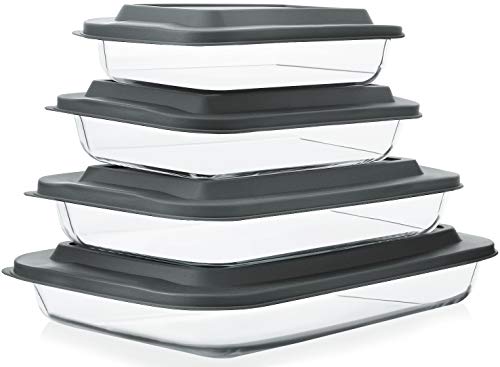
I recommend this baking dish set from Amazon. This set of bakeware is freezer and microwave-safe. It is available in several colors, and because you receive eight dishes in a variety of sizes, you can choose how big a portion of freezer enchiladas you want to make.
If you choose to use vacuum bags instead, I recommend these vacuum sealer bags. You will receive numerous bags for a reasonable price, and they are freezer-safe and BPA-free. Additionally, they are available in different sizes, allowing you to choose one that fits the number of enchiladas you cook rather than the other way around.

Once your enchiladas are in the freezer, you’re done – you’ve successfully frozen them!
Frozen enchiladas should be consumed within three months of being placed in the freezer. If you’re concerned that you’ll forget to eat them in time, you can also mark the date on the dish lid or vacuum bag before you place them in the freezer.
How To Freeze Individual Enchiladas
As mentioned above, you should not portion out your cooked enchiladas before freezing them. This is because, when defrosted, the filling and sauce tend to leak out and negatively affect the enchiladas’ taste.
However, if you’ve got leftovers, it’s best to freeze them for a later date rather than discard them. To freeze individual enchiladas, you can follow the same method described above – however, you should store each individual enchilada in a different vacuum bag or freezer-safe baking dish.
Alternatively, you can wrap each enchilada in plastic wrap and foil before freezing them. However, this makes them a lot messier to eat after you reheat them since you’ll need to remove the plastic wrap, so this is a method I avoid unless I have no other option.
How Do You Freeze Enchiladas Without Getting Soggy?


One of the biggest challenges with freezing cooked enchiladas is that the tortillas frequently get soggy when they are defrosted. This is because the sauce seeps into the enchiladas during the baking process and continues to soften the tortillas while frozen.
To freeze enchiladas without getting soggy, you should freeze uncooked enchiladas rather than cooked enchiladas. Instead, you can bake them after you thaw them. Alternatively, drain any excess liquid from the dish before flash-freezing your cooked enchiladas.
The reason I recommend freezing cooked enchiladas over uncooked enchiladas is convenience. Cooked frozen enchiladas will reheat and be ready to eat faster, while uncooked frozen enchiladas will take slightly longer to heat. Additionally, knowing how to freeze cooked enchiladas makes it easier to freeze leftovers.
If you prefer cooking your enchiladas before freezing them, you should drain any liquid in the dish before you flash freeze your enchiladas. However, there is still a risk that your tortillas will get soggy, which is why freezing uncooked enchiladas is the recommended course of action if you want to be certain of getting a non-soggy result.
Freezing uncooked enchiladas is easy – you can follow the method described above. The only difference between the two is that if you’re freezing uncooked enchiladas, you should flash-freeze your dish before you bake it. If you’re freezing cooked enchiladas, you should flash-freeze them after you bake them and allow them to cool down.
When you’re ready to bake your uncooked frozen enchiladas, you can simply remove them from the freezer and cook them as the recipe instructs. Unlike cooked frozen enchiladas, you do not need to thaw them first.
That said, keep in mind that you should bake your uncooked frozen enchiladas within 24 hours of removing them from the freezer. Just remember to transfer your enchiladas from the vacuum bag to a baking dish first!
Related What to Do if Tamales Are Soggy (And How to Avoid It).
How To Reheat Frozen Enchiladas
So, uncooked frozen enchiladas can simply be baked without defrosting – but what about cooked frozen enchiladas?
You can reheat cooked frozen enchiladas by allowing them to thaw overnight in your refrigerator. Once thawed, bake in the oven. Alternatively, you can bake them without thawing.
Once your enchiladas are thawed (or not, if you prefer to bake from frozen), you should transfer them to an oven-safe dish. Then, cover the thawed enchiladas with foil and bake for 15-20 minutes. Remove the foil, and bake once more for 5-15 minutes.
If you’re baking frozen uncooked enchiladas, you can follow the same method – the only difference is how long you’ll bake the enchiladas for. You should bake them for 30-35 minutes wrapped in the foil and then another 20-25 minutes without the foil.


Can I Freeze Enchiladas With Sour Cream?
Sour cream is a delicious accompaniment to many Mexican dishes, and enchiladas are no different. But, if your enchilada recipe calls for sour cream, can you freeze it with the rest of the assembled enchiladas, or should you pour it on after you defrost and reheat your meal?
You can freeze enchiladas with sour cream. However, freezing degrades the sour cream’s texture, making it split and grainy. If possible, you should use fresh sour cream after defrosting and baking your enchiladas.
Most dairy products, including sour cream, degrade in texture when frozen. One of the few exceptions is cheese – and then only as part of a cooked dish, rather than independently freezing cheese.
Can You Freeze Enchilada Filling?
You can freeze enchilada filling. Instead of freezing fully assembled enchiladas, you can freeze just the filling and sauce and use them to make enchiladas when needed.
Freezing enchilada filling is relatively straightforward:
- Make the filling.
- Allow the filling to cool completely and place in a ziptop, freezer-safe bag. Remove all the air from the bag before you seal it.
- Store the filling in your freezer.
Aside from the enchilada filling, you can also freeze enchilada sauce. You can follow the method described above – however, instead of freezing the sauce in ziptop bags, store them in freezer-safe glass jars. Storing in plastic ziptop bags will give your sauce a plastic, artificial taste over time.
Like enchiladas, you can also freeze the sauce and the filling for three months each.
Freezing the filling and the sauce is a good idea if you aren’t keen on freezing assembled enchiladas. You can simply freeze the major elements and thaw them out overnight in the refrigerator when you’re ready to cook your enchiladas. Once you thaw them, you should:
- Assemble your enchiladas with your pre-made filling
- Pour the sauce over the enchiladas
- Add cheese over the filling
- Bake according to the recipe
Final Thoughts
Freezing enchiladas is a relatively easy process, and this delicious dish takes freezing very well. Once frozen, they last for as long as three months, ensuring you’ll be able to reach into your freezer and grab an enchilada (or reheat the entire dish) on the days you simply don’t feel like cooking dinner.
For more, don’t miss How to Thicken Enchilada Sauce | The Best Way.


Anne James—lovingly known as Jelly Grandma—is a professional canner, seasoned home cook, and lifelong preserver of traditional Southern skills. With over 55 years of hands-on experience in canning, gardening, cooking, and quilting, Anne brings generations of wisdom to every guide she writes.
Featured in both local media and by national brands like Hershey, Anne now shares her knowledge through PreservingSweetness.com and her YouTube channel, helping others rediscover the “old ways” of living well and making things from scratch.