Fire pits can be frustrating. They may rust or be worn down after several uses, so you will quickly have to buy a new one or face hazards if the fire pit is near flammable objects.
If you have a back porch with a concrete foundation, you can use it to create a sturdier fire pit that will last longer than a store-bought one. You can do this relatively cheaply by using a cheap metal fire pit and stacking concrete blocks to form a sturdy, long-lasting shell.
An inexpensive portable fire pit, like this one found on Amazon, will do the trick nicely.
For detailed instructions on how to build a fire pit on a concrete slab to maximize fire resistance and save money, keep reading.


Choose Your Location
Concrete slabs are an excellent place for building fire pits. They are relatively fireproof, so fallen sticks and ashes from your fire will not ignite as they would if your fire pit was on grass. Moreover, fire pits built on concrete can be very attractive and are sturdier than moveable fire pits.
When you build your fire pit, you can use any concrete surface, but it is best if you already have a concrete patio. You should then choose a location that is somewhat central to your porch so that you can surround the pit with chairs. Ensure you choose a spot far from the edges so sparks from your fire do not ignite the grass!
Purchase a Small Round Fire Pit
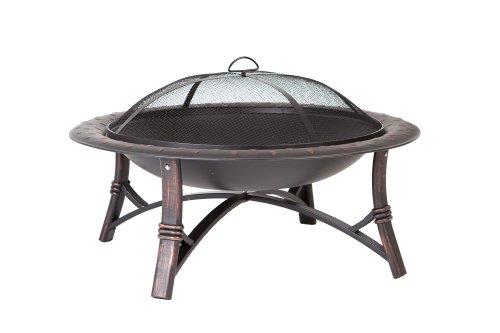
To create a fire pit, you will need a round, store-bought metal fire pit, like this one found on Amazon. This pit should be about 35 inches in diameter and come with a lid or grate to go on its top. This will be important for measuring purposes later. The pit should have a wide lip so you can secure it over the edge of the concrete blocks.
To save time, you could purchase your round pit as an assembly kit and not assemble it. This way, you can use the fire pit lid and bowl without removing them from the legs using a screwdriver.
If you already have a round fire pit and simply want to upgrade it into a concrete fire pit, you can use the existing pieces you have and do not need to purchase a new one. However, if your existing pit is rusted or old, you may want to purchase a new one to ensure maximum lifespan.
The one I recommend comes with a removable lid, as described. This pit is already painted with temperature-resistant paint, so it should last a long time and keep up with your concrete in fires.
Obtain Cinder Blocks or Stones
To build your fire pit, you will need concrete blocks or stones to create the pit’s rim. The blocks should have flat tops so you can easily stack them, and they do not necessarily have to be cement but should be composed of some sort of fireproof material.
Cinder blocks are very cheap and may only be $1-$3 each at Lowe’s or Home Depot. This can help you save money and is one of the main reasons concrete fire pits can be cost-effective, as they will last long periods and are not very expensive in the short run. Overall, you could build your concrete fire pit for under $150 if you find a reasonably-priced pit to compose the main section. Completely fireproof cinder blocks can be virtually permanent if they do not fall.
Related 4 Cheapest Places To Buy Cinder Blocks.
Stack the Blocks
Next, you will need to stack your concrete blocks to form the base of your fire pit. Complete this step carefully because a stable base can last for many years if done correctly!
1. Prep Work- Take your fire pit cover out of your kit or off your existing fire pit and place it on the ground where you want your pit. Make sure you use a lid that corresponds with the wide-lipped bowl that you are using, so it is the right size. You should double-check to make sure the lid is in the exact spot you want your fire pit because you won’t be able to move it after this step.
2. Build Up The 1st Layer of Blocks- Surround the lid with concrete blocks as tightly as you can, pushing them into the lid to form a tight and precise circle. After the first circle is created, you can remove the fire pit lid, so you don’t have to worry about it later, but this can be done at any point in your process.
3. 2nd/3rd Layer- Once the pit lid is removed, you can start stacking the second layer of bricks. You should stagger them from the second row by placing the center of the new layer in line with the crack between two bricks on the bottom. This process will stabilize the bricks so they do not topple easily. Then, you should add the third layer of bricks, staggering your layers again.
4. Adjust as Needed- You should use at least three layers of concrete blocks to build your pit. However, after the first three, you can stack them higher and adjust them as needed. Overall, keep staggering the blocks with every row, and you can add as many as you’d like to find the height that best matches your patio furniture and height.
Pro Tip: Taller fire pits will have less stability, so don’t go overboard when deciding your pit’s height. However, the pit should stay still, and the blocks should not shift because they are very heavy. Customizing your pit’s height is one of the largest advantages of a concrete pit!
Secure the Fire Pit’s Base
1. Prep the Bowl- Take the bowl of your store-bought fire pit off of the stand. To do this, flip the fire pit over and locate the edge where the leg meets the bowl. It should be screwed together, so you can use a screwdriver to remove them. Simply rotate the screwdriver left to loosen the legs and take the bowl. If you have a fire pit assembly kit that you have not put together, you can use the fire bowl section without removing the legs.
2. Spray the Bowl- Then, you can spray the bowl with high-heat temperature paint. This will seal the pit and help it last longer while retaining fire resistance without wearing it down.
3. Installation- When the base has been sprayed, set the bowl on the cinder blocks, laying the base’s lip over the edges, so it fits perfectly. You can attach the lips of the bowl to the cinder blocks using cement or glue, but if you leave it unattached, you will be able to move it as needed and empty ashes or sticks from the pit for easy cleaning. Furthermore, if you do not attach the bowl to the base, you can replace it more easily if there are any issues.
Related How Much Does a Cinder Block Weigh? | By Size and Type.
If you want a visual representation of these steps to demonstrate how to build a fire pit on a concrete slab, you should check out this video. It demonstrates these steps and can show you what staggering looks like.

Conclusion
If you follow the steps above, you should have a sturdy, reliable fire pit on a concrete base! Luckily, this type of fire pit enables you to enjoy fires anywhere in your yard by giving you the autonomy to build wherever you have a concrete slab.
Now, you can save money and stay safe using a fire pit with a long lifespan and sturdy foundation. Anyone with concrete in their yard can create this easy, attractive fire pit to enjoy in any season.


Jim James Jr. is the founder of SurvivalFreedom.com and the author of over 1,500 in-depth guides on survival, preparedness, and practical problem-solving. With a background in history, research, and real-world testing, Jim breaks down complex topics into clear, actionable advice. He is a published author and expert on the outdoors and survivalism.
From food storage to firearm maintenance to fixing things around the house, Jim helps readers stay self-reliant with solutions that actually work—no fluff, just facts.